
Why Countdown Timers Matter for Your Website
Think lower back to the ultimate time you noticed a limited-time sale on-line. Did your coronary heart race a little, feeling that “hurry up” vibe? That’s exactly why countdown timers are so effective—they don’t just display numbers; they create urgency, improve engagement, and push visitors to do so.
With Elementor Pro, the Countdown Timer Widget makes it clean to add this experience of urgency to your pages. In this tutorial, you’ll discover ways to use Elementor Pro countdown timer widget, discover HTML/CSS/JavaScript examples, and even put into effect it in Shopify.
By the cease of this guide, you’ll be able to design a completely practical, visually appealing countdown timer that works perfectly on all gadgets.
What is the Elementor Pro Countdown Timer Widget?
The Elementor Pro Countdown Timer Widget is a effective tool that allows you to create timers to your internet site without touching a line of code. It’s best for:
- Product launches
- Flash sales
- Webinars and stay occasions
- Limited-time gives
Key Benefits:
- Choose Fixed Date or Evergreen countdowns
- Set moves after expiry (redirect or display custom messages)
- Customize look: fonts, colors, backgrounds, animations
- Option to restart the timer mechanically
- Support for more than one timezones
How to Add and Configure the Elementor Countdown Timer Widget
Here’s a step-via-step manual to get your timer up and running:
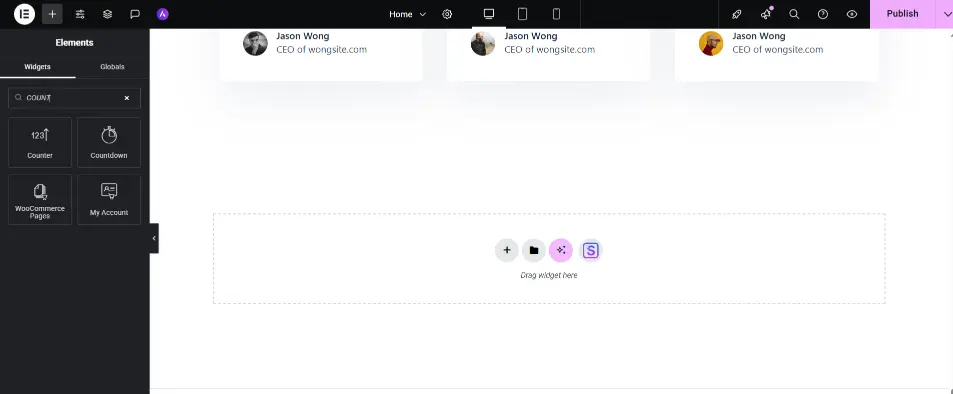
Step 1: Add the Countdown Widget
- Open your web page in Elementor editor.
- Drag the Countdown Timer Widget into the segment wherein you need it.
- Drop it in and preview the position.
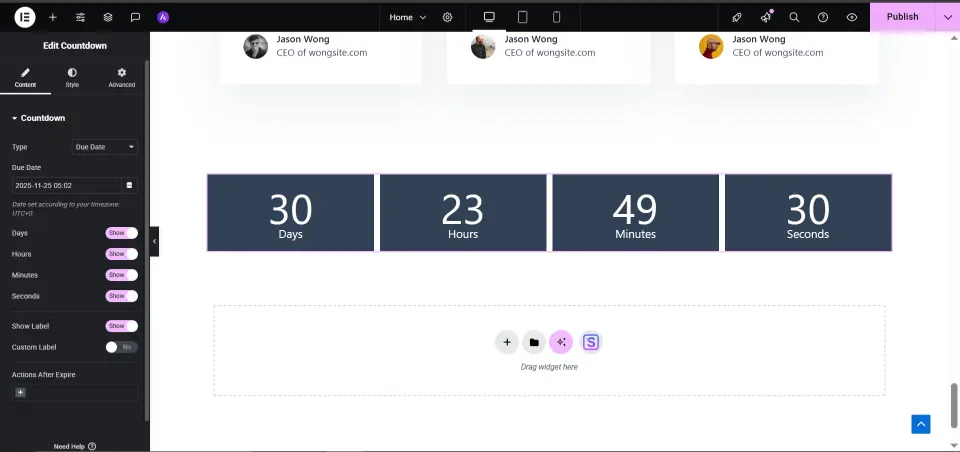
Step 2: Configure Your Timer
- Type: Choose amongst Fixed Date or Evergreen timer.
- Expiry Date/Duration: Set your intended expiration time.
- Termination Actions: Decide whether or not to redirect users or display a custom message.
Step 3: Style the Timer
- Adjust fonts, colors, borders and backgrounds.
- Use animation or gradient effects to make it beautiful.
- Always check mobile responsiveness.
Step 4: Advanced Options
- Restart the countdown after regular termination.
- Handle two timezones seamlessly.
- Redirect customers to a special page when the timer expires.
Comparison Table – Elementor vs Shopify vs Custom Code
For developers, you can create a custom countdown timer using HTML, CSS and JavaScript:
function startCountdown(endDate, displayElement) {
  function updateTimer() {
    const now = new Date().getTime();
    const distance = endDate - now;

    if (distance < 0) {
      clearInterval(timer);
      displayElement.innerHTML = "EXPIRED";
      return;
    }

    const days = Math.floor(distance / (1000 * 60 * 60 * 24));
    const hours = Math.floor((distance % (1000 * 60 * 60 * 24)) / (1000 * 60 * 60));
    const minutes = Math.floor((distance % (1000 * 60 * 60)) / (1000 * 60));
    const seconds = Math.floor((distance % (1000 * 60)) / 1000);

    displayElement.innerHTML = `${days}d ${hours}h ${minutes}m ${seconds}s`;
  }

  const timer = setInterval(updateTimer, 1000);
  updateTimer();
}
CSS styling tips
- Add a flip-clock animation or circular progress bar.
- Ensure mobile responsiveness.
- Use clear fonts and spacing for readability.
Shopify Countdown Timer Implementation
Shopify store owners can use Liquid to create custom countdown timers without relying on apps:
<div id="shopify-countdown"></div>
<script>
  var endDate = new Date("2025-12-31T23:59:59").getTime();
  var displayElement = document.getElementById("shopify-countdown");
  startCountdown(endDate, displayElement);
</script>
Practical Uses:
- Product pages for flash sales
- Collection pages for special events
- Cart pages for limited-time discounts
Code Highlight Widget in Elementor Pro
When showing code snippets, the Code Highlight Widget is extremely helpful:
- Automatically highlights syntax for HTML/CSS/JS.
- Responsive display on all devices.
- Built-in copy-to-clipboard button.
- Customizable styling for code blocks.
Advanced Tips and Features
- Use multiple timers on the same page without conflicts.
- Add pause and resume functionality.
- Circular progress bar animations make timers engaging.
- Redirect users automatically once the timer ends.
- Handle different timezones efficiently.
Comparison Table – Elementor vs Shopify vs Custom Code
| Feature | Elementor Widget | Custom JS | Shopify Liquid |
|---|---|---|---|
| Ease of Use | ✅ Beginner-friendly | ⚠️ Advanced | ⚠️ Moderate |
| Customization | ⚠️ Medium | ✅ High | ⚠️ Medium |
| Mobile Responsive | ✅ | ✅ | ✅ |
| Coding Required | ❌ None | ✅ Required | ⚠️ Some |
| Recommended For | Beginners & Marketers | Developers | Shopify Store Owners |
Common questions
Q1: Can I routinely restart the Elementor countdown timer?
A: Yes! Allow restart only after optional termination in settings.
Q2: Is it possible to have two countdown timers on one page?
A: Absolutely. Make sure each timer has a unique ID to avoid conflicts.
Q3: How do I implement a Shopify countdown timer without an app?
A: Use the liquid snippet in product, collection or cart templates.
Q4: Will the timer paintings on cellular devices?
A: Yes, the widget is completely responsive and works on all devices.
Conclusion
Elementor Pro Countdown Timer Widget is a need to-have tool for all website proprietors who need to create urgency, increase sales and increase consumer engagement. Whether you pick Elementor, custom JavaScript, or Shopify Liquid, this manual gives suggestions, advanced functions, and examples that you won’t effortlessly find everywhere else.
“You also can watch our videos on our YouTube channel or touch upon our Facebook page for greater assist.”