Elementor Flip Box Widget Tutorial – How You Can Create Interactive Flip Cards That Engage Users
Ever wondered how a few websites display information so smartly which you’re tempted to hover just to peer what’s subsequent? That’s the magic of a flip box. It’s not only a design trick — it’s an enjoy enhancer.
In this Elementor Flip Box Widget Tutorial, you’ll discover ways to create the ones beautiful the front-and-returned animations the use of Elementor, how to upload CSS turn card animation outcomes, or even a way to enforce turn cards inner your Shopify store.
So, allow’s dive in — due to the fact when you master this, you’ll in no way move again to uninteresting static bins once more.
What Is an Elementor Flip Box Widget?
The Elementor Flip Box Widget is a powerful characteristic that lets you display records on facets of a field — a the front and a again. When a visitor hovers or clicks, the box “flips,” revealing hidden content material inclusive of information, buttons, or links.
Think of it like a virtual greeting card — clean, attractive, and amusing to use. I take into account after I introduced my first turn box to a consumer’s homepage. The soar rate dropped immediately because customers began interacting with the design. That’s the actual effect of an excellent turn box.
Why You Should Use Flip Boxes on Your Website
Flip boxes upload character in your internet site. Here’s why they’re really worth trying:
- Better Engagement: People obviously love movement and interplay.
- Saves Space: You can display greater data without cluttering your format.
- Professional Look: It makes your design look modern-day and premium.
- Ideal for Portfolios and Services: Perfect for showing “before and after” information or short summaries.
Whether you’re displaying crew profiles, service details, or product highlights, a flip container instantly grabs interest.
How to Use the Flip Box Widget in Elementor (Step-by using-Step)
Let’s go through it like you’re sitting beside me:
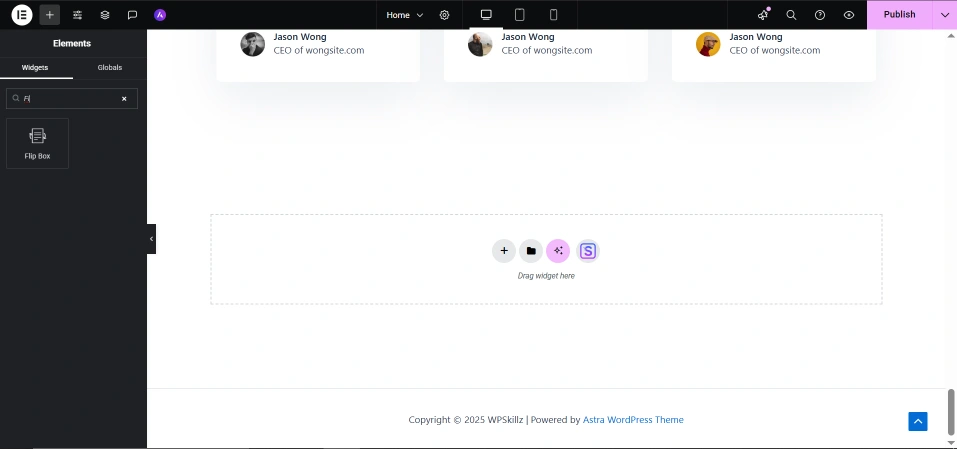
- Open Elementor Editor → Edit your desired page.
- Search “Flip Box” Widget → Drag it into your segment.
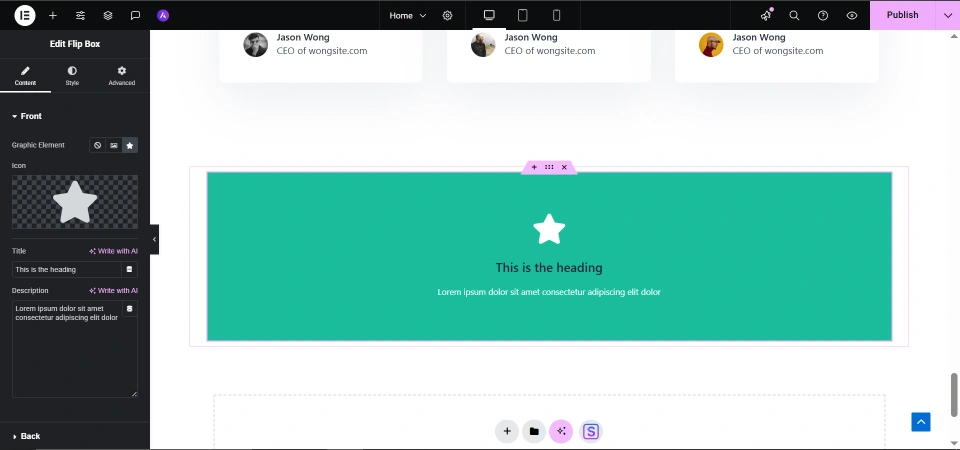
- Front Side Setup: Add an photo, icon, or brief heading.
- Back Side Setup: Write your distinct description, hyperlink, or call-to-action.
- Style Tab: Customize sun shades, history, padding, and typography.
- Advanced Tab: Choose animation path (left, right, up, down) and hover trigger.
- Responsive Settings: Always test on cellular — switch hover to click for higher usability.
💡 Tip: Keep your again-side textual content quick and scannable. Users turn rapid; they don’t need to examine paragraphs.
Elementor Flip Box Customization Guide
Elementor offers tons of customization freedom. Here’s how you can take it to the subsequent stage:
- Add gradient backgrounds or picture overlays for extra intensity.
- Use hover results for icons or text coloration transitions.
- Control turn animation length – 0.3s feels crisp, zero.6s feels cinematic.
- Experiment with border radius and shadows to make gambling cards pop.
- Add responsive breakpoints for mobile alignment.
These small tweaks make your layout feel hand made — and that’s what units a expert internet site aside from a template.
Adding CSS Flip Card Animation Effects (Manual Code Method)
Want to learn how this works behind the scenes? Let’s construct one with HTML & CSS. You can paste this into an Elementor HTML widget.
<div class="flip-card">
  <div class="flip-inner">
    <div class="flip-front">
      <h3>Front Side</h3>
      <p>Hover to see more</p>
    </div>
    <div class="flip-back">
      <h3>Back Side</h3>
      <p>Here’s your hidden content</p>
    </div>
  </div>
</div>
.flip-card {
  width: 300px;
  height: 200px;
  perspective: 1000px;
}
.flip-inner {
  position: relative;
  width: 100%;
  height: 100%;
  transition: transform 0.6s;
  transform-style: preserve-3d;
}
.flip-card:hover .flip-inner {
  transform: rotateY(180deg);
}
.flip-front, .flip-back {
  position: absolute;
  width: 100%;
  height: 100%;
  backface-visibility: hidden;
  display: flex;
  justify-content: center;
  align-items: center;
  flex-direction: column;
  border-radius: 10px;
  box-shadow: 0 4px 10px rgba(0,0,0,0.15);
}
.flip-back {
  background: #fafafa;
  transform: rotateY(180deg);
}
This gives you a smooth 3D flip animation, exactly like the one Elementor creates visually — but here, you have total control.
Shopify Flip Card Implementation (For Store Owners)
Shopify doesn’t have a built-in flip card, but you can easily make one using HTML, CSS, and Liquid code.
Paste this inside a custom Liquid section or “Custom HTML” block:
<div class="shopify-flip-card">
  <div class="flip-inner">
    <div class="flip-front">
      <img src="{{ product.featured_image | img_url: '480x480' }}" alt="{{ product.title }}">
      <h4>{{ product.title }}</h4>
    </div>
    <div class="flip-back">
      <p>{{ product.description | strip_html | truncate: 100 }}</p>
      <a href="{{ product.url }}" class="btn">View Product</a>
    </div>
  </div>
</div>
Add similar CSS as above, and boom — you’ve got a Shopify flip card implementation that brings your store to life.
Flip Box vs Regular Cards — What’s the Difference?
| Feature | Flip Box | Normal Card |
|---|---|---|
| Animation | 3D Flip Motion | Static |
| Space Usage | Compact | Takes More Space |
| Engagement | High | Low |
| Visual Appeal | Modern | Basic |
If your goal is to make visitors interact and explore more, the flip box wins every time.
Best Practices & SEO Tips for Flip Boxes
- Keep content meaningful — don’t just flip for design’s sake.
- Optimize images (use WebP or compressed JPEG).
- Add alt text with relevant keywords (e.g., “flip box Elementor design”).
- Use minimal animations — too many can slow your site.
- Test mobile view — click triggers perform better than hover.
- Use internal links interior your turn field (e.G., “Learn More” → associated blog).
This ensures your design stays both user-pleasant and Google algorithm-pleasant.
FAQs About Elementor Flip Boxes
Q1: Do I want Elementor Pro to use flip containers?
You can use the widget in Elementor Pro, however several unfastened plugins offer comparable capability.
Q2: Can flip boxes gradual down my internet site?
If you use huge pictures or too many animations, sure. Optimize your media and maintain consequences diffused.
Q3: Are flip boxes SEO-friendly?
Absolutely, as long as you operate readable textual content and proper headings. Google can’t study textual content inner photographs, so hold content material in text form.
Q4: Can I add flip boxes in Shopify without apps?
Yes! Using custom Liquid and CSS (as proven above), you could without problems upload them to your product pages.
Final Thoughts — Make Your Website Speak Visually
A flip box is greater than just an animation — it’s a storytelling element. It allows you connect to your target audience in a manner simple textual content never should. If you comply with this Elementor Flip Box Widget Tutorial carefully, you’ll be able to layout packing containers that look professional, load rapid, and preserve customers clicking.
And consider — creativity + clarity = conversion.
👉 You can also watch our motion pictures on our YouTube channel or touch upon our Facebook web page for greater help.