Elementor Animated Heading Widget Tutorial – Bring Your Website Text to Life
When a visitor lands on your website, the first thing they notice isn’t your logo or navigation — it’s your heading.
A bold, dynamic heading can stop the scroll instantly, while a plain one fades into the background.
That’s where the Elementor Animated Heading Widget shines. It transforms regular textual content into some thing alive — shifting, fading, typing, or rotating in a manner that feels each professional and expressive.
In this distinctive tutorial, you’ll learn how to use the Elementor Animated Heading Widget, how it works backstage, and how to integrate it with animated pricing tables the use of Elementor and custom CSS for maximum visual impact.
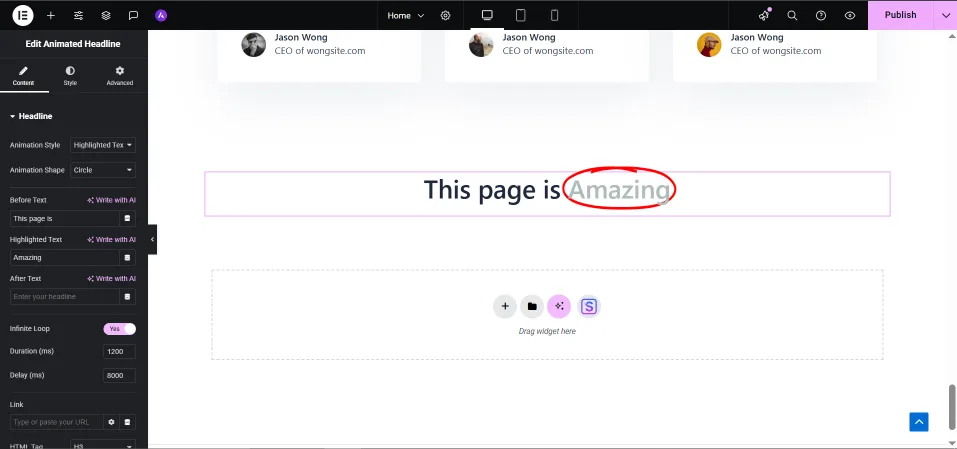
What Is the Elementor Animated Heading Widget?
The Animated Heading Widget in Elementor lets you layout visually enticing headings that flow or alternate dynamically.
It’s ideal for giving your pages motion and emotion — no coding required.
This widget works through blending static text with lively text.
For example:
We Create [Dreams | Stories | Designs]
We Create [Dreams remains fixed while “Dreams,” “Stories,” and “Designs” cycle via with a smooth animation — giving rhythm and power to your heading.
✅Where You Can Use It
- Hero sections and landing pages
- Portfolio or employer websites .
- Product or provider highlights
- Call-to-action banners
- Blog or feature headers
Whether you want subtle motion or bold transitions, this widget facilitates you express your message in a visually memorable way.
How to Use the Animated Heading Widget in Elementor
Let’s pass step-by means of-step thru putting in place an lively heading — even if you’re new to Elementor.
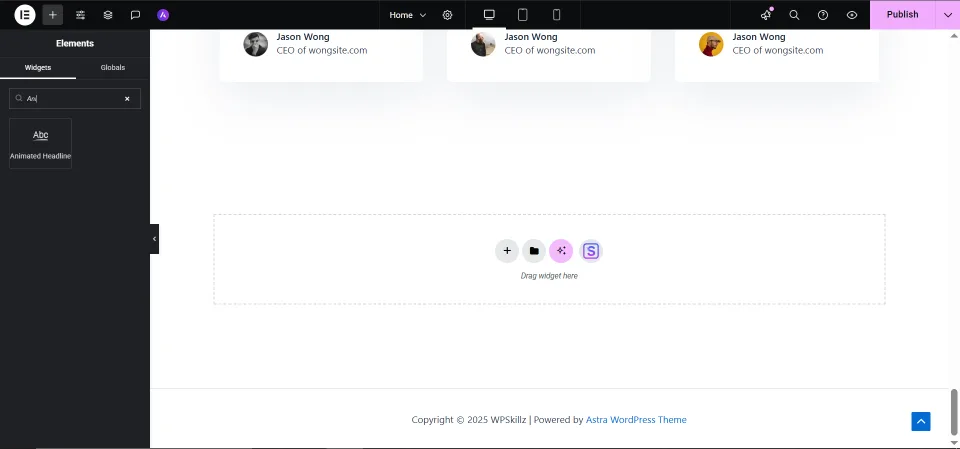
Step 1: Add the Widget
Open your page in Elementor Editor, then look for “Animated Heading” in the widget panel.
Drag it to your favorite section – preferably your hero banner or intro header nearby.
Step 2: Configure the Text
Inside the Content tab, you’ll locate key fields:
- Before Text – your static textual content (e.G., “We Design”)
- Animated Text – the changing element Stories”)
Step 3: Choose the animation style
Select your preferred animation type:
- Typewriter – realistic typing effect
- Fade – smooth dissolution between words
- Slide – horizontal or vertical movement
- Zoom – magnifying the transition
- Spin – rotating word change
Drag it into your desired phase — ideally your hero banner or intro heading region. for example, Typewriter sounds conversational, while Fade offers a clean, professional feel.
Step 4: Style It
Go to the Style tab and customize:
- Font and length
- Text shadow and spacing
- Alignment and spacing between letters
- Animation speed and delay
With just a few changes, your course goes from static to impressive, ready to show heads.
💡 How it really works behind the scenes
The animation you notice is not magic – it’s powered through a combination of CSS transitions and lightweight JavaScript constructed into Elementor.
When the page loads, the widget cycles through the animated text using controlled timing, opacity, and morph effects. You can even adjust the duration, delay, or direction of the animation in a custom rhythm’s settings.
For instance, the Typewriter impact famous each person sequentially, mimicking actual typing – perfect for portfolios, agency introductions, or narrative pages.
Adding custom CSS animation effects
If you use Elementor Pro, you can go beyond standard animations with custom CSS.
Here’s an instance of a clean fade-in animation you may follow for your identify:
.animated-heading span {
  animation: fadeInUp 1s ease-in-out;
  color: #007bff;
}

@keyframes fadeInUp {
  0% {
    opacity: 0;
    transform: translateY(20px);
  }
  100% {
    opacity: 1;
    transform: translateY(0);
  }
}
Just paste this code into
Advanced → Custom CSS
and your drive will seem smoothly – fashionable and appealing without being overpowering.
💡 Pro Tip
Experiment with:
- Gradient text
- Neon glow or shadow animation
- Clip route transitions
But consider: less is more. Animation ought to beautify the message, now not distract from it.
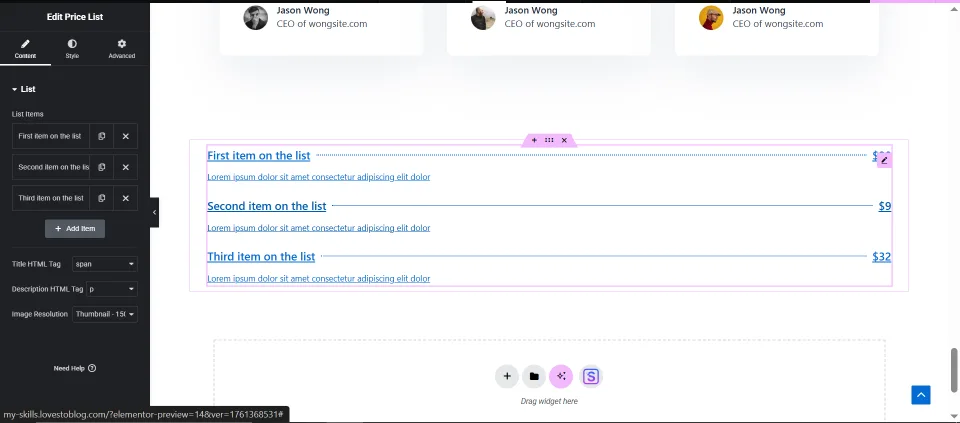
Animated Pricing Tables – Add movement to conversion sections
Animations aren’t only for headings. You can use similar techniques to make your pricing tables stand out and attract clicks.
Step 1: Add a Pricing Table Widget
In Elementor, drag the Pricing Table Widget into your layout.
Step 2: Enable Motion Effects
Go to Advanced → Motion Effects, and pick out from:
- Fade In
- Up Zoom In
- Slide from Left or Right
- Bounce In
You can also upload hover results so when a consumer movements their cursor over a plan, it subtly zooms or adjustments colour — right away drawing interest to your most precious offer.
Step 3: Add Hover Animation with CSS
Here’s a easy, easy hover animation for a rate card:
<div class="price-card">
  <h3>Pro Plan</h3>
  <p>$29/month</p>
  <button>Get Started</button>
</div>
.price-card {
  padding: 20px;
  background: #fff;
  border-radius: 10px;
  transition: all 0.3s ease-in-out;
  box-shadow: 0 3px 10px rgba(0,0,0,0.1);
}
.price-card:hover {
  transform: scale(1.05);
  box-shadow: 0 6px 20px rgba(0,0,0,0.15);
}
This provides a professional, interactive hover effect – no plugins or heavy scripts required.
Why animation improves UX and SEO
Animation isn’t just about looking good – it affects how visitors feel and interact with your website. Google values user engagement and subtle animations can improve:
- ⏱ Time on page – visitors stay longer
- 👀 Engagement – animated text grabs attention
- 💬 Conversions — more clicks on CTAs
- 📉 Bounce rate – users explore instead of leaving
As long as animationAs long as animations are smooth and don’t slow down loading speed, they improve user experience and SEO performance.
Animated vs Static Headings
| Feature | Animated Heading | Static Heading |
|---|---|---|
| Visual Appeal | ⭐⭐⭐⭐ | ⭐ |
| Engagement | High | Low |
| Customization | Flexible | Limited |
| Coding Needed | None | None |
| SEO Benefit | Positive (better UX) | Neutral |
Animated headlines are proven to make visitors pause, read and remember.
Expert Tips for Professional Animation
- Keep it subtle: Fast, smooth transitions look modern and refined.
- Stay on brand: Adapt your movement style to your business tone (corporate → minimal, creative → playful).
- Prioritize readability: Contrast and font size are more important than fancy effects.
- Optimize for mobile devices: Always view on smaller screens.
- Ideal timing: Between 0.8-1.2 seconds is visually appealing.
Frequently asked questions
Q1. Is the Animated Heading widget to be had in Elementor Free?
Yes, but it provides strict standards. Elementor Pro unlocks extra customization and CSS control.
Q2. Are animations dragging my website down?
Not at all – Elementor uses lightweight CSS and JS, optimized for performance.
Q3. Can I create custom animations?
Yes, you can write your own CSS or use external libraries like Animate.css.
Q4.Are animated titles SEO friendly?
Yes – they use readable HTML textual content, fully indexable by search engines like Google and Yahoo.
Q5. Can I animate different elements including buttons or icons?
Definitely! Motion effects can be applied to almost any Elementor widget.
🏁 Final ThFinal thoughts
In modern web design is animation is more than decoration — it’s storytelling.
The Elementor Animated Heading Widget allows you to communicate excitement, confidence, and creativity without a single line of code.
When combined with animated pricing tables, you build pages that feel alive — guiding visitors naturally toward your calls to action.
So next time you design a page, don’t just write a heading — make it move.
Because motion doesn’t just display your message…
it speaks to your audience.