Bring Your Website to Life with Elementor Counter Widget & Progress Tracker
Have you ever visited a internet site and noticed the ones numbers that appear to magically count number up as you scroll? I still take into account the primary time I added an Elementor Counter Widget to a consumer’s website online. We had been displaying undertaking milestones, and the stats appeared flat and uninteresting. The moment I animated those counters, the section felt alive.
Similarly, if you want to showcase steps, progress, or milestones—like in an online course, a project tracker, or an onboarding process—the Progress Tracker is a game-changer. Don’t fear if you’re no longer a coding expert; I’ll guide you via each step so your internet site looks interactive and expert.

Why counters and progress trackers are essential
Before diving into the setup, let’s identify why those widgets are crucial:
- Attention: Animated numbers and development bars obviously entice the visitor’s eye.
- Highlight achievements: Show earnings statistics, tasks completed or social media growth.
- Visualize Progress: Visitors like to see milestones or milestones completed.
- Boost Engagement: Interactive elements retain users for longer on your web page.
Think approximately it: a static wide variety like “5000 followers” feels stupid. But watching it climb from 0 to 5000? That little motion gives a sense of accomplishment, keeps users hooked, and even feels rewarding.
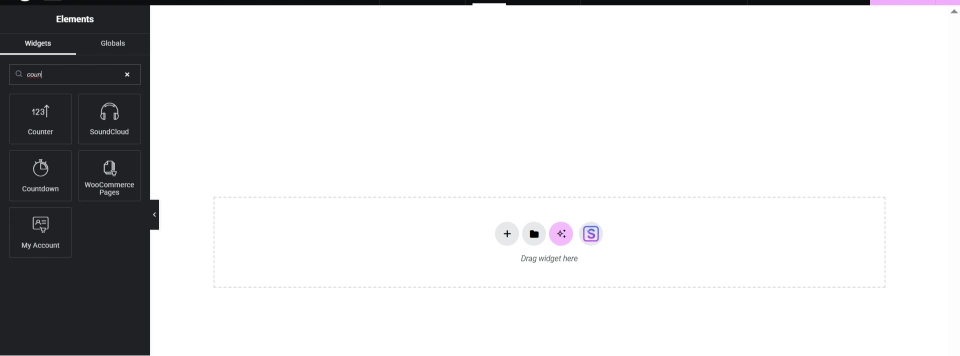
Step 1: Using the Elementor Counter Widget
Adding animated counters is simple. Here’s how I manual beginners:
- Open Elementor on the web page you want to edit.
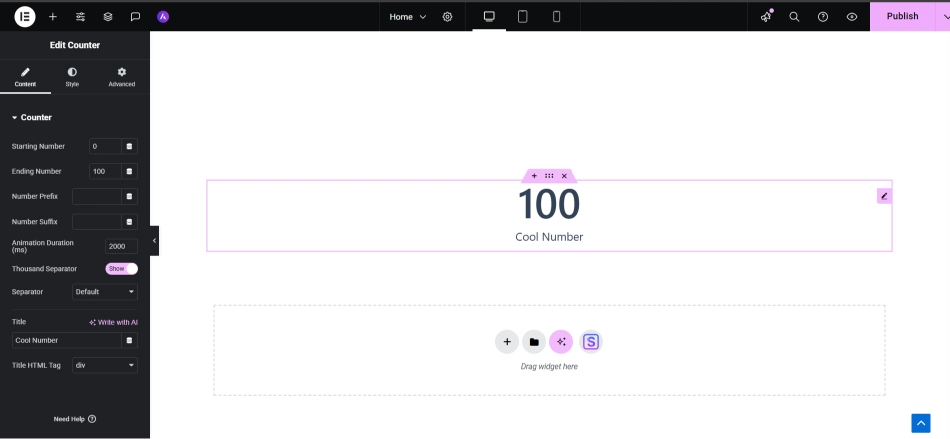
- Drag the Counter Widget from the Pro panel onto your web page.
- Set Start and End Values (as an example, zero to 1500).
- Customize Appearance: fonts, colorings, and prefixes/suffixes like $, +, or K.
- Set Animation Duration: 2–three seconds usually seems herbal.
- Optional: Trigger the counter best when it will become seen on the display.
Pro Tip: Don’t crush the page. Limit to three–5 counters for a clean and expert look.
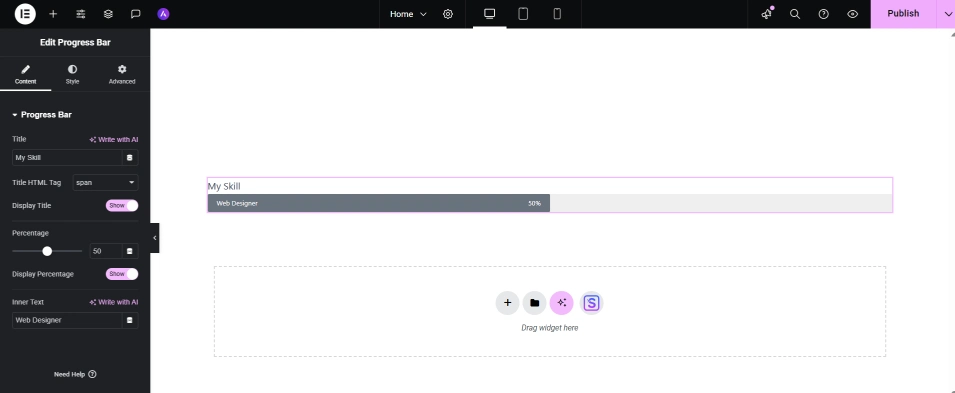
Step 2: Adding a Progress Tracker
Progress Trackers are ideal while displaying steps, milestones, or route development:
- Project Milestones: Step 1, Step 2, Step 3—truly marked.
- Form Completion: Helps customers recognize how some distance they’ve advanced, decreasing drop-offs.
- Course Modules: Students can music finished training, keeping them encouraged.
HTML Structure Example
<div class="progress-tracker">
  <div class="progress-step active">Step 1</div>
  <div class="progress-step">Step 2</div>
  <div class="progress-step">Step 3</div>
</div>
CSS for Styling
.progress-step {
  display: inline-block;
  width: 100px;
  height: 12px;
  background: #ddd;
  margin-right: 5px;
  transition: background 0.4s ease;
}
.progress-step.active {
  background: #4CAF50;
}
Add Interaction with JavaScript
const steps = document.querySelectorAll('.progress-step');
steps.forEach((step, index) => {
  step.addEventListener('click', () => {
    steps.forEach(s => s.classList.remove('active'));
    for (let i = 0; i <= index; i++) {
      steps[i].classList.add('active');
    }
  });
});
Tip: Combine counters with development steps. For instance, finishing Step 1 can purpose a counter displaying completed duties. This makes the enjoy attractive and worthwhile.
Step 3: Advanced Counter Animation (Coding Version)
For those comfortable with coding, you can further personalize the counters:
function animateCounter(element, target, duration = 2000) {
  let count = 0;
  const increment = target / (duration / 16);
  const timer = setInterval(() => {
    count += increment;
    if (count >= target) {
      element.textContent = target;
      clearInterval(timer);
    } else {
      element.textContent = Math.floor(count);
    }
  }, 16);
}

const counter = document.querySelector('.my-counter');
animateCounter(counter, 1500);
- Use prefixes or suffixes like
$,%, or+. - Trigger animations simplest whilst the element appears at the display screen for clean consumer revel in (IntersectionObserver is extremely good for this).
Practical Tips From My Experience
- Use contrasting colors: Active steps and numbers need to stand out.
- Keep animations short: 2-3 seconds feels natural; Can feel slow for long periods of time.
- Limit counters in step with the page: Too many counters weigh down site visitors.
- Check mobile responsiveness: Elementor generally handles this well, though constantly double-testing.
- Test and Adjust: Different audiences reply in any other case; tweak based mostly on actual visitor conduct.
FAQs
Q1: Can I use counters in free Elementor?
A1: No, lively counters are Pro-best. Free users can mimic the effect the usage of HTML, CSS, and JavaScript.
Q2: How can I animate numbers just on scroll?
A2: Use IntersectionObserver in JavaScript to create animations while the element is being viewed.
Q3: Can multiple counters have distinct intervals?
A3: Yes, assign a fact length function for each counter and adjust the JS function accordingly.
Q4: How can I customize progress tracking steps?
A4: Use CSS for shades and patterns, and JavaScript to highlight steps as live dynamic.
Q5: Can counters and progress meters be combined in Elementor templates?
A5: Absolutely! Elementor Pro allows combining more than one widget and custom code seamlessly.
Conclusion
The Elementor Counter Widget and Progress Tracker are easy but powerful tools that may rework a internet site. They don’t just show numbers or steps—they interact traffic, build trust, and create a professional, interactive revel in.
Remember: less is more. Avoid overcrowding your internet page with too many counters or steps. Keep it clean, visually appealing, and functional.
You also can watch our films on our YouTube channel or comment on our Facebook web page for additonal assist.