Introduction
Creating a pricing table in Elementor Pro isn’t pretty much putting costs and buttons — it’s about supporting your visitors pick out with a bit of luck. In this manual, I’ll walk you step-by-step through the process of constructing a responsive, highly customizable, and visually clean pricing table the use of Elementor Pro. You’ll additionally examine some professional tips that most tutorials never communicate about — like pricing psychology, responsive testing, and code tricks to improve pace and search engine optimization.
So, seize your espresso — let’s build something stunning and clever.
What Is the Elementor Pro Pricing Table Widget?
The Pricing Table Widget in Elementor Pro is a drag-and-drop block that lets you display services or product plans truly.
It helps your target audience apprehend what every plan gives — without confusion or clutter.
You can:
- Add plan names, descriptions, and fees
- Insert CTAs like “Get Started” or “Buy Now”
- Add ribbons that include “Best Value.”
- Customize fonts, colors, and format
- Keep the whole lot responsive for cell customers
👉 Why these subjects:
A well-designed pricing desk builds agreement and subtly guides users to pick out your most worthwhile plan.
Step-by-Step: How to Create a Pricing Table in Elementor Pro
Let’s begin simply and make it professional.
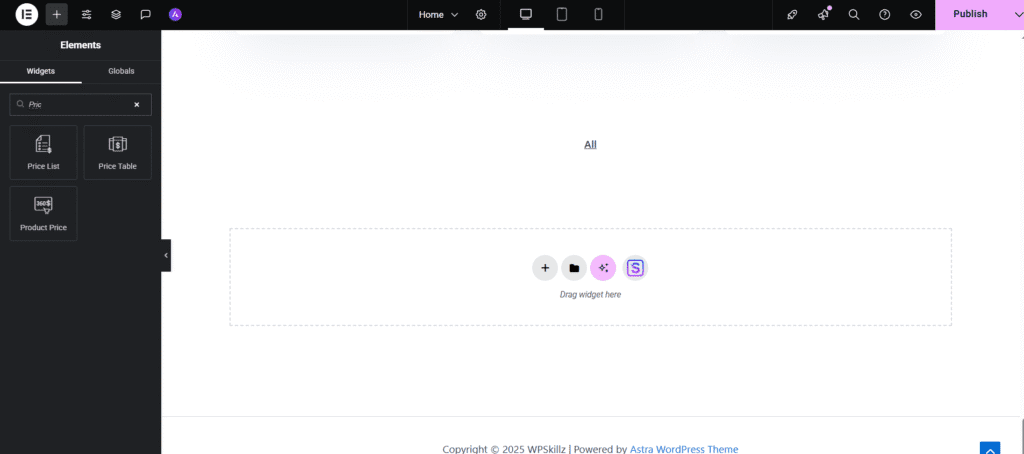
Step 1: Add the Widget
- Open your website page in Elementor.
- In the widget panel, search for “Pricing Table.”
- Drag it into your section.
(Tip: If you’re using Elementor v3.20 or later, you’ll find extra layout presets — try them first.)
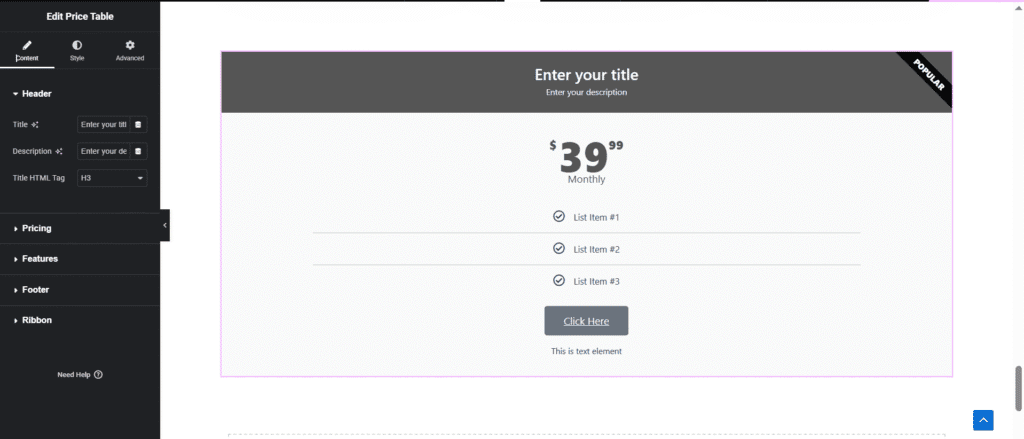
Step 2: Edit the Content
Here’s the way you set the muse:
| Section | What to Add | Example |
|---|---|---|
| Plan Title | Name of your package | Basic / Pro / Premium |
| Price | Amount & duration | $19 / month |
| Description | Short tagline | Perfect for freelancers |
| Features | List your benefits | 10GB storage, Support |
| Button | CTA text | Get Started |
👉 Pro tip: Keep your plan titles clean and smooth. Avoid fancy names that confuse site visitors.
Step 3: Customize the Style
Now, it’s time to make its appearance awesome.
Go to the Style Tab and play with:
- Font length and typography
- Background and hover coloration
- Button styles
- Padding and spacing
💡 Conversion tip:
Highlight your middle plan with the usage of a ribbon or formidable coloration. It draws attention — studies indicates 70% of users choose the highlighted alternative.
Adding Custom HTML & CSS for a Unique Look
Want your table to sense extra custom than each other Elementor site out there? You can add a touch of HTML and CSS to personalize it.
<div class="pricing-table">
  <div class="plan">
    <h3>Basic</h3>
    <p class="price">$9<span>/month</span></p>
    <ul>
      <li>1 Website</li>
      <li>5GB Storage</li>
      <li>Email Support</li>
    </ul>
    <a href="#" class="btn">Get Started</a>
  </div>
</div>
.pricing-table {
  display: flex;
  justify-content: center;
  background: #f9f9f9;
  padding: 40px;
  border-radius: 15px;
}
.plan {
  background: #fff;
  border: 1.5px solid #e4e4e4;
  border-radius: 12px;
  padding: 25px;
  text-align: center;
  width: 260px;
  transition: all 0.3s ease;
}
.plan:hover {
  transform: translateY(-8px);
  box-shadow: 0 10px 25px rgba(0, 0, 0, 0.1);
}
.plan .btn {
  background: #0073e6;
  color: #fff;
  padding: 10px 22px;
  border-radius: 30px;
  text-decoration: none;
  transition: 0.3s;
}
.plan .btn:hover {
  background: #005bb5;
}
Why this code works:
It’s clean, lightweight, and SEO-friendly.
You can paste this into Elementor’s HTML widget and tweak it every time.
Add a JavaScript Price Toggle (Interactive Effect)
Want users to switch between monthly and yearly pricing?
Here’s a small, stable JavaScript snippet:
<label class="switch">
  <input type="checkbox" id="priceToggle">
  <span class="slider"></span>
</label>
<p id="price">$9 / month</p>

<script>
document.getElementById('priceToggle').addEventListener('change', function() {
  const price = document.getElementById('price');
  price.textContent = this.checked ? '$90 / year' : '$9 / month';
});
</script>
💡 Real-international tip: This improves engagement time — a key search engine advertising element for Google.
Elementor Pro Pricing Table Settings (2025 Update)
| Setting | Description | Example |
|---|---|---|
| Plan Title | Your product plan name | Starter, Pro |
| Price | Monthly or yearly rate | $29 / month |
| Features | Key benefits | Unlimited support |
| Ribbon | Highlight option | “Most Popular” |
| CTA Button | Action text | “Buy Now” |
| Style Tab | Design customization | Colors, spacing |
| Advanced Tab | Motion & spacing | Animation, margins |
Insider Design Tips You Won’t Find Elsewhere
- Keep your plans balanced — don’t overload one column.
- Use icons instead of plain bullets; it improves scanning speed.
- Match your brand color in the button to reinforce trust.
- Use pricing psychology — numbers like $nine.Ninety nine experience smaller than $10.
- Test mobile first — 70% of visitors compare prices on phones.
Elementor vs Custom Code — Which Wins?
| Feature | Elementor Pro | Custom Code |
|---|---|---|
| Ease of Use | Beginner-friendly | Needs skill |
| Design Freedom | High | Unlimited |
| Performance | Optimized | Can be faster |
| Responsiveness | Built-in | Requires media queries |
| Cost | Paid | Free (time cost) |
👉 Verdict:
Use Elementor Pro for brief builds, and blend custom code when you want total control.
That’s how specialists stabilize velocity + precision.
Common Problems & Real Fixes
| Problem | Possible Cause | Quick Fix |
|---|---|---|
| Table not responsive | Fixed width CSS | Use max-width: 100% |
| Hover not working | Missing transition | Add transition: 0.3s; |
| Columns uneven | Padding mismatch | Use same spacing |
| Toggle not working | Wrong JS ID | Match HTML & JS |
| Button not clickable | Z-index conflict | Add position: relative; |
SEO and AdSense optimization checklist
- ✅ Use your primary keyword naturally 2-3 times.
- ✅ Add secondary keywords in subheadings.
- ✅ Compress images for faster loading speed.
- ✅ Add alt text with your main keyword.
- ✅ Keep sentences short – maximum 20 words each.
- ✅ Link to your other Elementor tutorials.
- ✅ Avoid duplicate content (Google checks for this).
- ✅ Provide value – real explanations, not supplementary text.
💡 Remember: Google’s 2025 Useful Content Update rewards human-style guides that learn and solve real-world problems.
Final Thoughts
Building a pricing desk in Elementor Pro is greater than design — it’s verbal exchange. You’re displaying to your target audience why your plans are worth it. Once you combine Elementor’s flexibility with clever HTML, CSS, and a dash of interactivity, you’ll have a pricing table that loads speedily, looks exquisite, and converts beautifully.
Now it’s your flip — open Elementor and start creating your best pricing phase today. You’ll be surprised how professional your web page can look with just a few smart tweaks.
Frequently asked questions
Q1. Can I use the pricing desk in Elementor Free?
No. It’s to be had most effective in Elementor Pro. But you could construct a primary version using columns and buttons.
Q2. Will adding custom code slow down my site?
Not if it’s smooth and minimal — the snippets above are optimized for velocity.
Q3. Can I show reductions dynamically?
Yes! Use the JS switch to switch between regular and discounted prices
Q4. What’s the correct number of plans?
Three — it provides choice without confusing your visitors.
Q5. Is this setup AdSense-safe?
Absolutely. Clean, readable code and helpful content follow AdSense quality standards.